Introduction
The Spark of an Idea
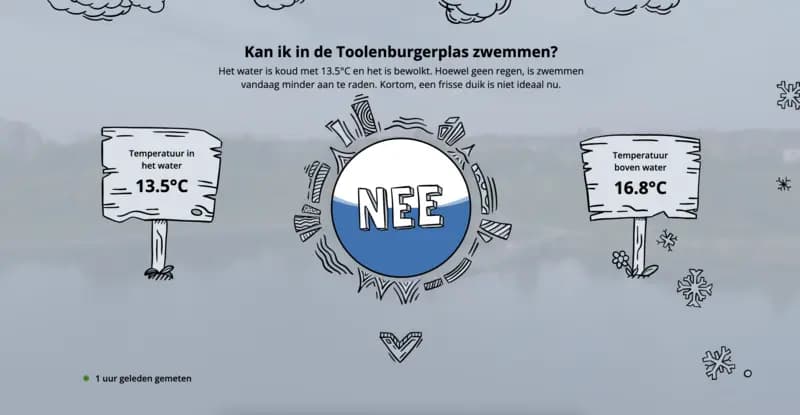
Wouldn’t it be useful to know the exact temperature of the lake year-round? This simple idea led us to brainstorm a system that could monitor the lake's water temperature remotely. If we could track the water temperature, we would know precisely when it was warm enough to swim again. And why stop there? Making the data accessible to others who enjoy the lake could benefit the broader community. Our goal was to build a device that could measure the lake's water temperature continuously and display the data online for anyone to access.
Designing the Solution
We began exploring how we could implement this idea. The core requirements were:
- A reliable temperature sensor to measure the water temperature year-round.
- A microcontroller to process the sensor data.
- A data connection to send the information to a server where it could be stored and accessed.
The plan was to display the data on a website for easy access, showing both current temperatures and trends over time.
Version 1 - Building the Prototype
Power Source and Efficiency
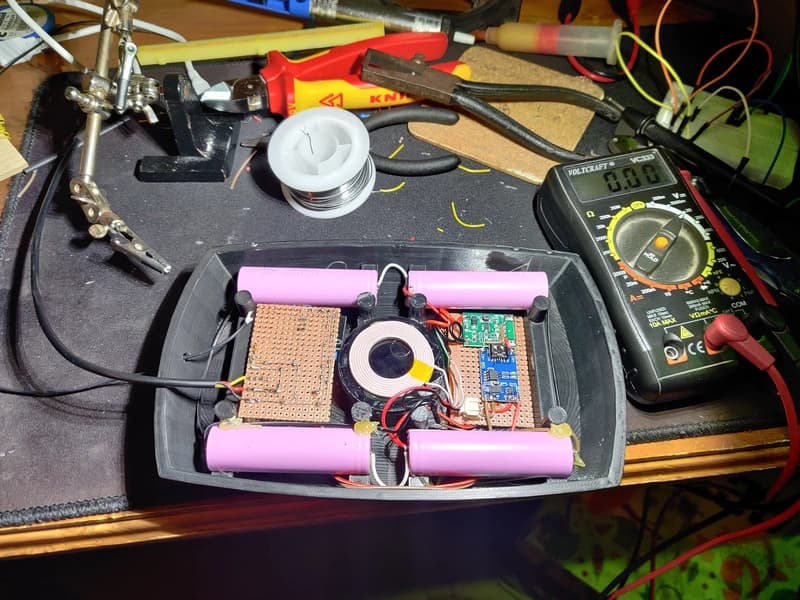
To ensure the device could operate for extended periods, we used four 18650 batteries in parallel, charged by a wireless charging coil inside the enclosure. To conserve power, we programmed the Arduino to "sleep" most of the time, only waking up hourly to take measurements and send data. This approach worked well, allowing the device to last over a month on a single charge.
Software and Website
API Challenges
We encountered challenges with API security because the Arduino had limited support for SSL certificates. To solve this, I set up an Nginx reverse proxy on a VPS to handle SSL termination, forwarding requests securely to the Supabase API. Using Let's Encrypt, I ensured the certificates would renew automatically. To optimize wake-up times, I removed unnecessary root certificates, leaving only ISRG Root X1, which is valid until 2035—hopefully, the hardware lasts that long!
Disaster Strikes!
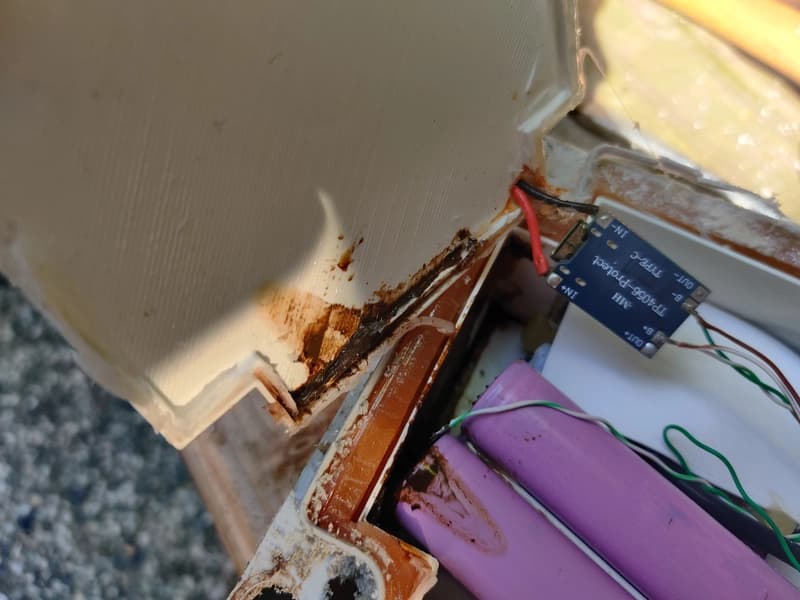
We encountered a few issues during the project. The biggest concern was ensuring the enclosure was watertight, but initial tests showed no signs of leaks. However, after a month and a half of successful operation, the device stopped sending data.
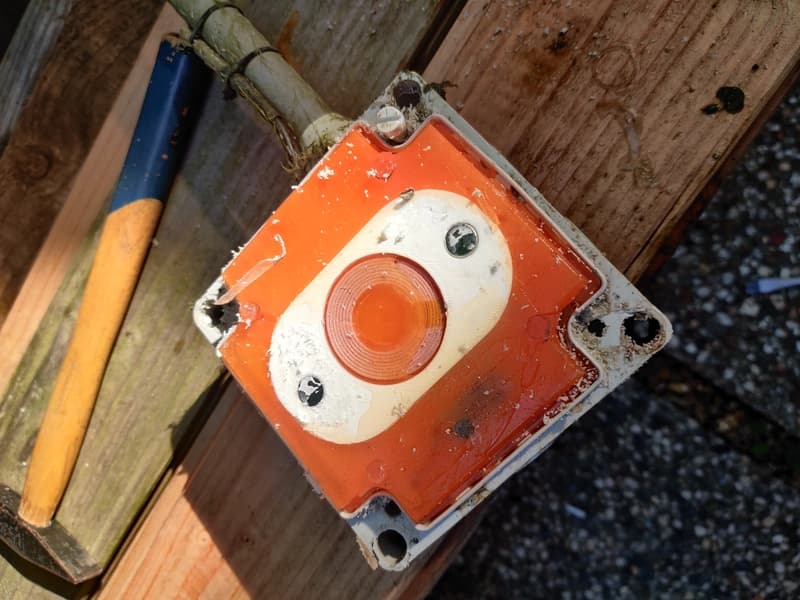
Upon inspection, we discovered that the antenna, placed outside the enclosure, had corroded due to exposure to the elements. Initially, we suspected moisture inside the enclosure, but after breaking the seal, we found that the interior was completely dry. However, with the seal broken, the device could no longer be submerged.
Version 2 - The one that failed
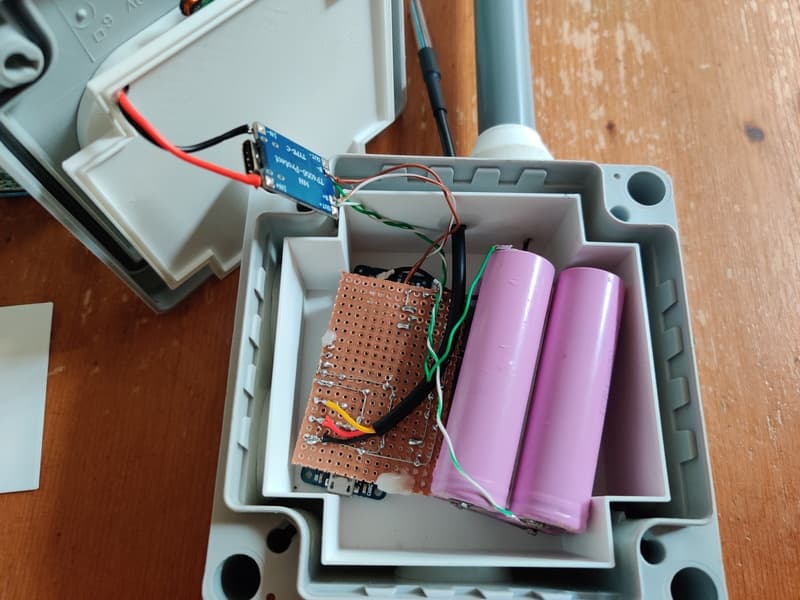
We redesigned the enclosure to place the antenna in a sealed compartment, keeping it protected from rainwater while maintaining connectivity. However, this design had a different problem. The previous enclosure had to be broken open, which meant that we had to create a new enclosure from scratch. Instead of using a 3D printer, we decided to use a electrical junction box, which was easier to work with. We sealed the electronics inside of a smaller 3D-printed box, sourounded by epoxy resin. Which we hoped would keep the electronics dry.
Unfortunately, this version stopped working after a few weeks, we saw the internal humidity sensor climbing to 100%, after which it wasn't able to read the internal temperature and humidity anymore. The external temperature sensor was still working, but only for a couple of days.
We left the device in the water for a few more weeks, but it never recovered.
Version 3 - Our best idea yet
Originally we wanted most of the device to be submerged, with only the antenna exposed. This would make the device less visible, and less likely to be tampered with. But, this prebuilt device would be much easier to replace, and was less expensive then the previous two versions. We decided to give it a try.
We installed the new v3 buoy in the Toolenburgerplas, but we had some issues, it seemed there was no coverage at the location where we placed the buoy. So we looked into adding a LoRaWAN gateway near the lake, to ensure we had coverage.
We registered our device on the KPN network, and after a while we received data in the KPN Things Portal. In order to forward this data to our website, we needed to change the API endpoint to work with the new data format.
After which we were able to see the LoRaWAN data in our website! IT WORKED!